Canning tomatoes, the process of packing them into jars and heat-treating them, can extend their shelf life and assure you an all-year supply of flavorful tomatoes even in the off-season. You can use these preserved tomatoes in a myriad of ways; think soups, sauces, stews - you name it! This method is fantastic, especially if you have a bountiful tomato harvest from your garden or want to make the most of the season's abundant yield from your family farmers. The basic required equipment is quite simple - jars, lids, jar lifter and a large boiling pot.
If this still seems daunting, don't be worried. Our ultimate guide here is designed to walk you through the entire process, ensuring an easy and successful tomato canning experience. So, let's dive in!
Why Can Tomatoes at Home?
Home canning tomatoes allows you to have control over the ingredients used. Expect no preservatives or additives. This practice saves money, reduces food waste and gives you access to fresh-tasting tomatoes all year round. Another plus point? You can customize your tomato preserves by adding herbs, spices or vegetables. Convenience is one more benefit: having canned tomatoes on hand makes meal preparation much quicker and easier all year round!
Ready to Start Canning Tomatoes?
To begin, gather all necessary tools: jars, lids, large pot, canning rack, jar lifter, and a timer. Then select your best tomatoes, and go!
Selecting the Right Tomatoes for Canning
The general wisdom here is that it's best to take tomatoes that are perfectly ripe and firm with no blemishes for canning. Although I can't disagree with the fact that perfect tomatoes will make perfect tomato preserves, I can say i've been successfully using damaged tomatoes and seconds for years in my tomato canning. I just make sure to remove the damaged part as I cut and prepare the tomatoes.
One thing that will make a big difference is the type of tomato that you will choose. Italian tomatoes are loved because they are more meaty, have less water content, fewer seeds and sometimes a thinner skin. If your end goal is a thick pasta or pizza sauce, Italian tomatoes are a good choice. They are however typically a smaller kind of tomato, and hence might require a bit more handling during preparation.
Canning round tomatoes (or the more standard beefsteak tomatoes) is another good option. This will yield a more liquidy sauce, that will be perfect to use in tomato soups, juices, stews, and for cooking in general. These tomatoes might have a tougher skin and more seeds. Some folks will blanch them to remove the skins, or use a tomato milling machine to remove the skins and seeds. Me I like to keep it all, I think it's all good stuff. I just blend it all with a hand mixer and I don't mind that it adds texture to my sauce.
As usual, if you want to keep the pesticides out of your body tissues, and participate in an agriculture that promotes life on the planet and a healthy living environment for all involved, make sure you use organic tomatoes. They might be from you own garden, or from your local family farmer, it's all part of the solution! Members of our organic basket program can typically purchase 25 lbs cases of round or italian tomatoes from our online farm store in the beginning of September.
Gathering Essential Equipment and Supplies
For a successful tomato canning experience, the required equipment includes:
- canning jars with lids, often Mason jars, known for their reliable airtight seal.
- A large, deep pot with a canning rack is needed for sterilizing these jars. Make sure your pot is large enough to allow complete submersion of the jars in water.
- A kitchen timer will also come in handy to adhere to correct processing times, a crucial step for product quality and safety.
- Jar lifters are very handy to safely handle the jars in boiling water. I have successfully used tongs for this purpose in the past, but it's not as safe. Jar lifters are pretty easy to come by and relatively inexpensive, it's a worth while investment!
- If you want to blend your sauce, a hand-blender will be handy. If you want to can your tomatotes whole or quartered, it's not necessary.
- Finally, have plentiful clean dish towels on hand for maintaining cleanliness while wiping jars and surfaces.
Gather your equipment, and let's get to canning those tomatoes!
Preparing Tomatoes for Canning
Start by removing any stems or leaves from the tomatoes. Cut out any damaged areas as well. This step will ensure that your canned tomatoes are free from any unwanted debris or spoiled portions.
Blanching: If you want to blanch your tomatoes, use this tip: to easily remove tomato skins, score an 'X' on the bottom of each tomato before blanching. This will create a starting point for the skin to peel off easily after blanching. Blanch the tomatoes by placing them in boiling water for about 30 seconds, then transfer them to an ice bath. The brief exposure to the boiling water will loosen the skins and make them easier to remove. Once cooled, you can easily slip off the tomato skins. Cut the tomatoes into quarters or leave them whole, depending on your preference. Quartered tomatoes are great for recipes that call for diced tomatoes, while leaving them whole is perfect for canning them as slices.
Personnally I don't bother with blanching and removing skins. I prefer to dice the tomatoes right away and trow them all in the pot for sauce making.
Different Methods of Canning Tomatoes
Tomatoes can be preserved using two main methods: water bath canning and pressure canning. The water bath method involves placing jars in boiling water, which kills bacteria and creates a seal. It's the easiest and an excellent choice to preserve tomatoes on their own, as an ingredient to use later in the year.
Pressure canning, on the other hand, uses high pressure and heat to preserve tomatoes. This method is often preferred for low-acid foods but it does require more equipment and knowledge compared to water bath canning. Pressure canning will be needed if you want to can a tomato sauce that contains meat.
Water Bath Canning
To perform water bath canning, you need a large pot or canner, glass jars with lids, and a rack to keep the jars off the bottom of the pot. This setup ensures that the jars are surrounded by boiling water, allowing for proper preservation and safety.
Some people like to prepare the tomatoes by blanching them in boiling water, peeling off the skin, removing any cores or seeds, and then packing them into the jars with added liquid, such as tomato juice or water. This method helps retain the tomato's natural flavors while ensuring a delicious and vibrant final product.
Another technique is to simply cut the tomatoes into pieces and cook them on their own or with other vegetables to reduce the water content. This method works well for those who prefer chunky tomatoes in their canned goods. You can also turn them to puree with a hand blender before canning.
In hot water bath tomato canning, it is crucial to add citric acid, lemon juice or vinegar to increase the acidity level of the tomatoes and ensure they are safe . Follow the instructions in your favorite recipe, but be aware that modern tomatoes are less acidic than they used to be, so if you use a very old recipe, this important step might not be included. Here are some recommendations to make sure your preserves are sufficiently acidic for safety, even if you are using low-acid varieties.
- For a 1 L jar (Quart) use
- two tablespoons of lemon juice
- 1/2 teaspoon of citric acid
- 4 tablespoons of 5% vinegar (vinegar might change the flavour)
- For a 500 ml jar (pint) use
- one tablespoon of lemon juice
- 1/4 teaspoon of citric acid
- 2 tablespoons of 5% vinegar (vinegar might change the flavour)
Once the jars are filled and properly acidified, they are submerged in boiling water for a specified amount of time (typically about 45 minutes, follow your recipe) to ensure proper preservation and safety. This process helps kill any bacteria or microorganisms present in the tomatoes, making the canned tomatoes safe for consumption.
After processing, the jars are removed from the canner and left undisturbed until cool. As the jars cool, you'll hear a satisfying popping sound as each jar seals. This sound is a clear indication that a proper seal has formed, ensuring the freshness and longevity of your canned tomatoes.
Sanitizing Jars and Lids
Start by washing jars thoroughly before boiling them for at least 10 minutes. Allow jars to cool down on a clean towel. You should also sanitize the lids by letting them simmer in water for about 5 minutes. This step is an extra precaution to avoid spoilage of your precious canned tomatoes.
An alternative method for sanitizing your jars is to run them clean in your dishwasher, at least through the rinse and sanitize cycle, depending on the settings you have access to.
Filling and Processing the Jars
Next, pour the hot sauce into the sanitized jars, leaving 1 m (1/2 inch) of headspace. Ensure there aren't any air bubbles in the jars and then clean any spills from the jar rims. Finally, process the jars in boiling water according to your recipe's instructions. Typically you'll wait until the water gets back to a rolling boil in the canner, and set your timer for 40 minutes for 500 ml (pint) jars and 45 minutes for 1 L (quart) jars.
Sealing and Storing the Jars
Once the sterilizing time has elapsed, take the jars out of the water bath using the jar lifters, and allow them to cool on a towel for 12-24 hours. To check if the jars are sealed properly, press down on the lid. If there's no movement or popping sound—congratulations! Your jars are sealed. These tasty canned tomatoes can be safely stored in a cool, dark place for a year.
Pressure Canning
Pressure canning is another method used for preserving tomatoes. It involves the use of a special pressure canner that allows you to maintain specific temperatures and pressures for safe tomato preservation.
You will need to use a pressure canner if you want to can a finished sauce that contains meat, or if you want to use low-acid tomatoes, and do now wish to add acidifying agents (citric acid, lemon juice, vinegar).
Once the jars are filled, they are placed inside the pressure canner, and the lid is locked in place. The canner is then heated until it reaches the desired pressure level, which may vary depending on your altitude and the recipe you're using. After the processing is complete, the pressure is gradually released before opening the canner.
Processing times are much quicker with pressure canning: 15 minutes at 15 PSI or 20 minutes at 10 PSI. Pressure canning can also result in tomatoes that are slightly firmer than water bath canning. It is an excellent way to preserve the flavor of your garden fresh tomatoes.
Storing Canned Tomatoes
After going through the canning process and successfully preserving your tomatoes, it's important to store them properly to maintain their quality and extend their shelf life. Find a cool, dark place in your pantry or basement where the temperature remains consistent. This will help prevent any spoilage or degradation of the canned tomatoes. It's a good idea to label your canned goods with the date of canning, so you can more easily keep track of your pantry organization.
Once you open a jar, any unused tomatoes can be transferred to an airtight container and refrigerated for up to 5 days. Canned tomatoes are incredibly versatile and can be used as a base for various sauces, soups, and stews.
Troubleshooting Common Canning Issues
Preventing jar breakage
When it comes to canning tomatoes, safeguarding your jars from breakage is crucial. To minimize the risk, opt for sturdily built jars explicitly crafted for home canning. Such jars have thick walls designed to withstand the intense heat and pressure of the canning process. Scrutinize your jars for any damage such as chips or cracks before canning, as such jars are more susceptible to breaking during the process or later during storage. Another point to consider is temperature regulation; rapid temperature changes can provoke breakage. So after processing, let the jars cool naturally and never expose them to cold water. Another trick, keeping a silicone mat at the bottom of your canner will cushion the jars, thereby reducing the chances of breakage. By following these precautions, you can ensure that your canning experience goes smoothly ad without any broken jars!
Avoiding spoilage and botulism risks
To avoid spoilage when canning tomatoes, start with fresh, ripe tomatoes, clean them up well and make sure you remove any parts that show signs of rot or decay. Additionally, it's important to properly acidify your tomato preserves. Tomatoes are just on the border between low and high acid foods, which means that they require additional acidification to prevent the growth of botulism. This can be achieved by adding lemon juice, vinegar or citric acid to the tomatoes before canning them.
Furthermore, proper sanitization of your equipment is essential to maintain the quality of your canned tomatoes. Make sure to wash your jars, lids, and bands in hot soapy water and then boil them for ten minutes to ensure that they are free from any bacteria or contaminants.
Last thing, store your canned tomatoes in a cool, dark place. This will help maintain their quality and reduce the risk of spoilage or botulism. By following these steps, you can ensure that your canned tomatoes stay fresh and safe to consume.
Complete basic tomato puree canning recipe
This first recipe is for a basic tomato puree, with the complete canning process.
See below for variations and tomato sauce recipes.
Ingredients:
- 25 pounds ( 11 kg) of ripe italian or round tomatoes, diced
- 2 tablespoons lemon juice per 1L (quart) jar (for canning)
Equipment:
- Large pot
- Hand blender
- Ladle
- Canning funnel
- Jar lifter
- Water bath canner
- Canning jars with lids and bands
- Approximate yield of this recipe is between 6 and 8 x 1L (quart) jars. It will vary depending on the final consistency of the sauce, water content of the tomatoes, and reduction in cooking.
Instructions:
- Prepare the Tomatoes:
- Thoroughly clean your tomatoes
- Cut out and discard the stem end and any damaged part of the tomatoes
- Dice the tomatoes, and set aside.
- Cook the Sauce:
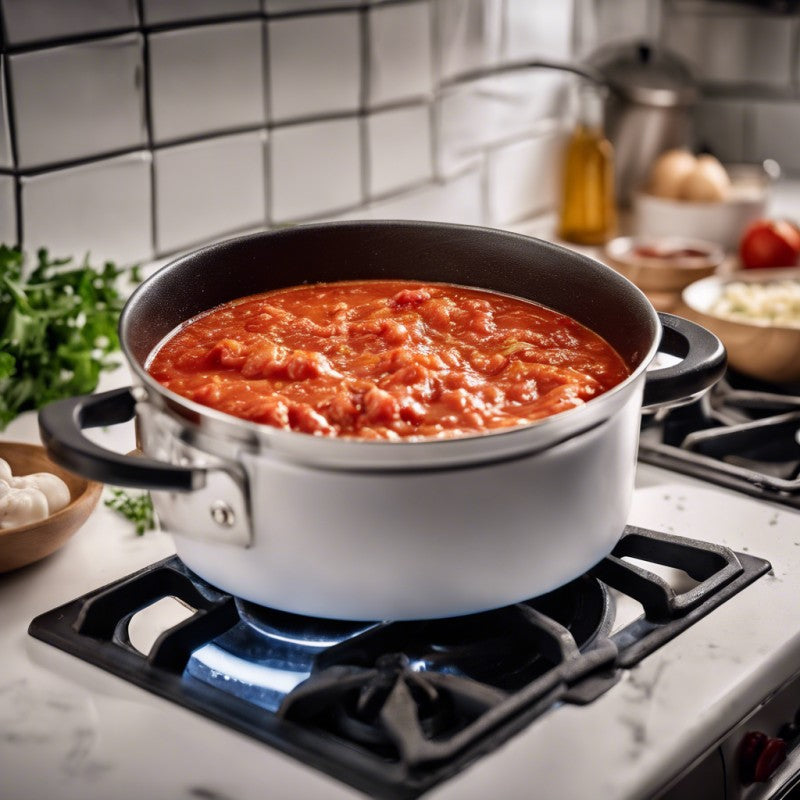
- In a large pot, heat the chopped tomatoes and bring a simmer and cook for about 3 hours or more, stirring occasionally, until it reaches the desired consistency.
- Blend the Sauce (optional):
- If a smoother sauce is desired blend the cooked tomato puree using a hand-blender.
- Prepare for Canning:
- Sanitize the jars by boiling them in your canner for 10 minutes.
- Sanitize the lids by simmering them in water for 5 minutes.
- Keep the jars and lids hot until they are used.
- You can also dip your ladle and funnel in boiling water for extra precaution.
- Fill the Jars:
- Add 2 tablespoons of lemon juice to each 1L (quart) jar to ensure safe acidity levels.
- Use a ladle and canning funnel to fill jars with hot puree, leaving 1 cm (1/2-inch) headspace.
- Remove Air Bubbles:
- Run a clean knife or spatula around the inside of the jar to remove any air bubbles.
- Wipe rims and seal:
- Wipe the rims of the jars with a clean, damp cloth to remove any residue.
- Place the lids on the jars and screw on the bands until fingertip tight.
- Process the Jars:
- Place the jars in a water bath canner with simmering water, ensuring they are completely covered with water.
- If needed add boiling water to canner to insure jars are covered by 2-4 cm (1-2 inches) of water.
- Bring to a boil and process 1L (quart) jars for 45 minutes (adjust time for altitude if necessary).
- Cool Down:
- After processing, turn off the heat and remove the canner lid.
- Let jars sit in the canner for 5 minutes before removing them with a jar lifter.
- Place jars on a towel or rack, space them out by several cm and let them cool for 12-24 hours.
- Check Seals:
- After cooling, check that the lids have sealed by pressing down in the center of each lid. If it doesn't pop back, it's sealed.
- You can remove the band, and use if for other canning projects.
- Label your jars with the contents and date before storing them in a cool, dark place.
Note: Adjustments may need to be made for altitude when canning. Always follow safe canning practices to prevent spoilage and foodborne illness.
Variation for a homemade canned pasta sauce.
Ingredients:
- 25 pounds ( 11 kg) of ripe Italian or round tomatoes, cleaned, cored and diced
- 4 large onions, finely chopped
- 12 cloves of garlic, minced
- 1/2 cup sunflower oil
- 1/2 cup finely chopped fresh basil
- 4 tablespoons finely chopped fresh oregano
- 2 tablespoons sugar (optional)
- 4 teaspoons salt
- 2 teaspoons black pepper
- 2 tablespoons lemon juice per quart (1L) jar (for canning)
- Cook the Sauce:
- In a large pot, heat the oil over medium heat.
- Add the onions and garlic and sauté until they are soft.
- Add the chopped tomatoes, basil, oregano, sugar (if using), salt, and pepper.
- Bring the mixture to a simmer and cook for about 3 hours or more, stirring occasionally, until it reaches the desired consistency.
- Processing and canning
Follow the steps 3-10 outlined above in the basic tomato puree recipe to can your classic tomato sauce.
Adding Flavor with Herbs and Spices
Experimenting with different herbs and spices is a great way to elevate the flavor of your canned tomatoes. By adding herbs like basil, oregano, garlic, and thyme, you can create a variety of delicious tomato recipes that will keep things varied during the winter.
You have the option of adding dried herbs directly to the jars before processing or using fresh herbs in your recipes. Don't be afraid to get creative and try unique combinations like rosemary and balsamic vinegar for a twist on traditional flavors. It's important to keep in mind that flavors can intensify during the canning process, so it's best to start with small amounts and adjust to taste.
Classic Ways to Use Canned Tomatoes
Classic Homemade Pasta Sauce
Ingredients:
- 1 pound ground beef (or other meat, or tofu, or meat substitute)
- 1 onion, finely chopped
- 2 cloves garlic, minced
- 2 quarts homemade tomato puree
- 1 tablespoon sunflower oil
- 1 teaspoon dried basil
- 1 teaspoon dried oregano
- 1/2 teaspoon salt (or to taste)
- 1/4 teaspoon black pepper (or to taste)
- Optional: 1/2 teaspoon sugar (to balance acidity)
Instructions:
- Brown the Meat:
- In a large saucepan or Dutch oven, heat the sunflower oil over medium heat.
- Add the ground beef or meat substitute and cook until browned, breaking it into crumbles with a spoon.
- Add Onions and Garlic:
- Add the chopped onion and minced garlic to the browned meat.
- Sauté until the onions are translucent and garlic is fragrant.
- Incorporate Tomato Puree:
- Add the homemade tomato puree to the saucepan, stirring well to combine.
- Season the Sauce:
- Stir in the dried basil, dried oregano, salt, and black pepper.
- Adjust the seasoning according to your taste preferences.
- Simmer and Cook:
- Bring the sauce to a gentle boil.
- Reduce the heat to low and let it simmer uncovered for at least 1 hour, stirring occasionally.
- The longer it simmers, the more flavorful it becomes. You can simmer it for up to 3 hours if you have the time.
- Serve or Store:
- Serve the classic pasta sauce over your favorite pasta or use it as a base for other recipes like lasagna or eggplant parmigiana.
- If you plan to store the sauce, let it cool completely before transferring it to airtight containers.
- Store in the refrigerator for up to 5 days or freeze for longer-term storage.
Hearty Tomato Soup using Homemade Tomato Puree
Who doesn't enjoy the timeless duo of a grilled cheese sandwich paired with a bowl of hot tomato soup? This combination brings us back to the simplicity of our favorite comfort food. And guess what? Your homemade tomato soup can be even more special when made with your own preserved tomatoes. Try it out!
Ingredients:
- 8 tablespoons butter (1/2 cup)
- 1 large onion, chopped
- 2 cloves garlic, minced
- 2 quarts homemade tomato puree
- 4 cups vegetable or chicken broth
- 1 teaspoon sugar
- 1 teaspoon dried basil
- 1 teaspoon dried oregano
- 1 1/2 teaspoon salt (or to taste)
- 1/4 teaspoon black pepper (or to taste)
- 1/2 cup heavy cream (optional, for a creamy version)
- Fresh basil leaves, for garnish (optional)
Instructions:
- Sauté the Onion and Garlic:
- In a large pot, melt the butter over medium heat.
- Add the chopped onion and minced garlic, and sauté until the onion is translucent and fragrant.
- Add the Tomato Puree:
- Pour in the homemade tomato puree into the pot, stirring well.
- Season and Simmer:
- Stir in the vegetable or chicken broth, sugar, dried basil, dried oregano, salt, and black pepper.
- Bring the mixture to a boil, then reduce the heat to low and let it simmer for about 40 minutes to allow the flavors to meld together.
- Blend the Soup:
- Using an immersion blender or working in batches with a regular blender, carefully blend the soup until smooth. Be cautious with hot liquids when using a regular blender.
- Add Cream (Optional):
- If desired, stir in the heavy cream to make the soup creamy. You can adjust the amount according to your preference.
- Heat and Serve:
- Return the soup to the stove and heat gently over low heat until warmed through.
- Ladle the tomato soup into bowls and garnish with fresh basil leaves if desired.
Enjoy your classic tomato soup with a delicious grilled cheese sandwich!
Whipping Up Delicious Salsas and Chutneys
Canned tomatoes offer endless possibilities when it comes to creating flavorful salsas and chutneys. Serve your salsa as a dip with chips or using it as a topping for your favorite Mexican dishes. By experimenting with different ingredients like onions, jalapenos, cilantro, and lime juice, you can create a salsa that suits your taste preferences perfectly.
And if you're a fan of Indian cuisine, canned tomatoes can be transformed into tangy chutneys that pair beautifully with dishes like samosas or pakoras. Just add spices like cumin, coriander, and ginger to your chutney, and you'll have a burst of flavor that will enhance any meal.
Homemade Mexican Salsa Recipe
Ingredients:
- 1 quart homemade tomato puree
- 1 onion, finely chopped
- 2-3 jalapeño peppers, finely chopped (adjust to taste)
- 1 red or yellow pepper, finely chopped
- 1/2 cup fresh cilantro, chopped
- 2 cloves garlic, minced
- 1 teaspoon ground cumin
- 1 teaspoon salt (or to taste)
- 1/2 teaspoon black pepper
- Juice of 2 limes
- Optional: 1-2 fresh tomatoes, finely diced (for added texture)
Instructions:
- Preparation:
- If using fresh tomatoes, finely dice them and set aside.
- Prepare the onion, jalapeño peppers, pepper, cilantro, and garlic as indicated.
- Combine Ingredients:
- In a mixing bowl, combine the homemade tomato puree, chopped onion, jalapeño peppers, peppers, cilantro, minced garlic, ground cumin, salt, black pepper, and lime juice.
- If using fresh tomatoes, add them to the mixture as well.
- Mix Thoroughly:
- Stir all the ingredients together until well combined.
- Refrigerate:
- Cover the salsa and refrigerate for at least 1 hour to allow the flavors to meld together.
- Adjust Seasoning:
- Taste the salsa and adjust the seasoning with additional salt, lime juice, or pepper if needed.
- Serve:
- Serve the homemade Mexican salsa with tortilla chips as an appetizer or as a topping for your favorite Mexican dishes.
Tangy Indian Tomato Chutney Recipe
Ingredients:
- 1 quart homemade tomato puree
- 1 tablespoon vegetable oil
- 1 teaspoon mustard seeds
- 1 teaspoon cumin seeds
- 1 medium onion, finely chopped
- 2-3 green chilies, finely chopped (adjust to taste)
- 4-5 cloves of garlic, minced
- 1-inch piece of ginger, grated
- 1 teaspoon ground coriander
- 1 teaspoon ground cumin
- 1/2 teaspoon turmeric
- 1 teaspoon salt (or to taste)
- 1/2 cup white vinegar or apple cider vinegar
- 1/4 cup brown sugar (adjust to taste)
- Fresh cilantro leaves for garnish
Instructions:
- Tempering the Spices:
- In a saucepan, heat the vegetable oil over medium heat.
- Add the mustard seeds and cumin seeds. Allow them to sizzle and pop for a few seconds.
- Add Aromatics:
- Add the finely chopped onions, green chilies, minced garlic, and grated ginger to the saucepan. Sauté until the onions are soft and translucent.
- Spice Infusion:
- Sprinkle in the ground coriander, ground cumin, turmeric, and salt. Stir well to combine and allow the spices to cook for a minute to release their flavors.
- Incorporate Tomato Puree:
- Pour in the homemade tomato puree and stir to combine with the spice mixture.
- Vinegar and Sugar:
- Pour in the vinegar and add the brown sugar. Stir well to combine all the ingredients.
- Simmering:
- Bring the chutney to a gentle boil, then reduce the heat to low and let it simmer uncovered for about 30-40 minutes, or until it reaches a chutney-like consistency. Stir occasionally.
- Cool and Serve:
- Allow the chutney to cool to room temperature.
- Transfer the tangy Indian tomato chutney to jars or containers, and refrigerate once cooled.
- Garnish with fresh cilantro leaves before serving.
This Indian tomato chutney can be enjoyed as a flavorful condiment with various Indian dishes or as a dip with snacks!
Conclusion
Canning your own tomatoes at home is a process that require minimal equipment and that, after all, is not that complicated, especially if you use the water bath method. It is extremely satisfactory and allows you to preserve the freshness of summer all year round. Nothing beats homemade organic preserved tomatoes.
If you follow the recipes in this guide, your canned tomatoes will become a versatile ingredient that can be used in a variety of dishes in your cooking. Whether you're making a classic tomato soup, a delicious salsa, or a tangy Indian chutney, canned tomatoes provide depth of flavor and convenience.
In the beginning of September is typically the time of year when our farm has surplus tomatoes. We make them available as an extra purchase in our online farm store for the members of our organic basket program. Visit our basket page for more information about our organic basket program.